 |
| It doesn't look too bad, but the undercarriage is dragging the mud. |
 |
| Every time I would try to move, it would slide and tip further. |
 |
| Cavalry has arrived! |
 |
| It doesn't look too bad, but the undercarriage is dragging the mud. |
 |
| Every time I would try to move, it would slide and tip further. |
 |
| Cavalry has arrived! |
 |
| Unloading the polyiso truck. This guy drove from Jacksonville, Florida that morning and was at the jobsite at 7:30! |
 |
| Roof edge blocking being installed. |
 |
| Wow, that is a lot of roofing material. |
 |
| Mocking up the drain with some scraps. |
 |
| It's good to have a neighbor with a forklift! Our Bobcat won't lift that high. Thanks Ricky! |
 |
| The master bedroom wing with all the tapered polyiso and the wood fiber cover board and tapered edge strips installed. Ready for the membrane! |
 |
| Dad, Matt, and Will did a great job. This is the neatest install I have ever seen. I have been on several big commercial jobs and the "professionals" are never this precise. |
 |
| I had to put this photo of Misha on here to showing him "helping" us out with the Bobcat. He loves this thing! |
 |
| Formwork laid out to apply a seal coating. |
 |
| First wall formwork about half complete. |
 |
| Pouring the wall. |
 |
| We ordered a 3500# mix with a slump of 5 with the intention to add some water to get the slump near 6, bit the 5 seemed to flow and vibrate fairly well. |
 |
| Finished wall after stripping the forms. |
 |
| Not to bad for our first time. Some bug holes, but overall I am satisfied with the results. |
 |
| Here is Dad working on forming the next wall to pour. |
 |
| View of front with most of the sheathing on. |
 |
| Advantech roof sheathing. |
 |
| Henry RF200 rolled out to relax in the sun. |
 |
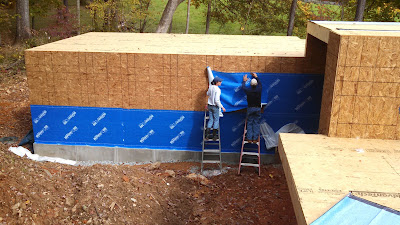
| Mom and Dad installing some of the Henry VP100. |
 |
| More VP100. |
 |
| VP100 almost complete. |
 |
| We have walls!!! |
 |
| More walls!!! |
 |
| Roof framing too! |
 |
| View towards the front entry. |
 |
| Standing near the office looking toward Misha's bedroom. |
 |
| Dining area with clerestory above. |
 |
| View into living room, check out the balloon framing! |
 |
| Floor slab complete standing on foyer looking toward living room; beginning of sole plate layout. |
 |
| Stucco brown coat complete, only one coat left! |
 |
| Slab again, looking toward foyer. Terry Oakleigh and the boys did a great job with the finishing. |
 |
| Slab again, looking toward dining area. |
 |
| Slab at Misha's bathroom. Plumbing blockouts removed. Rectangular are is where shower floor will be recessed into the slab. All three bathrooms in the house are done this way. Barrier free! |
 |
| Opening for stairway to basement. Hole to left is my interior crawlspace access. |
 |
| Got a visit from 1929 today... Bob Sanford stopped by with his Model A. |
 |
| Main waste line leaving the house, waterproofing, and my attempt at termite resistant slab edge insulation. |
 |
| Foundation & courtyard drainage. |
 |
| Ditto. |
 |
| Stucco underway... Lathing mostly done, scratch coat in progress. No EIFS here, only old school 3 coat portland cement plaster! |